Say goodbye to that rat's nest of breadboard wires. The BreadBox keeps your Arduino, Raspberry Pi experiments safe and solid. You can focus on your software, not on loose connections. You can even take your project to a local meet-up.
The BreadBox is an experimenter's kit made to hold your gear together so you can travel with it. No more having to figure out what came loose - the stuff that drives software folks crazy. This kit is designed to help a software person - like me - play with the analog world.
See a short video of the BreadBox in action!
UPDATE: It was fun while it lasted, but Jameco has discontinued their kit pgrogram. You can still read about it on their website Jameco Electronics. It was even featured in their newsletter!
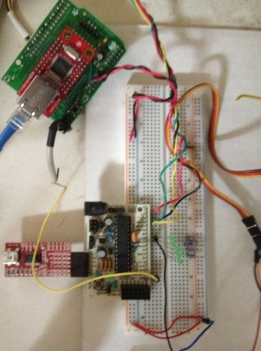
No more of this.
What? - The BreadBox is a physically stable platform that is meant to travel without breaking. The upper platform holds servo motors and some input devices. The lower platform holds your microcontroller. The two are held together so nothing moves. It all fits in the logo box where it is kept safe (well, the interior isn't padded so I wouldn't ship it like this). You can pack up your kit and carry to a friend's house or meet-up. Or just keep it in the trunk of your car so you always have it with you. There's even room for a small USB power supply and a cable
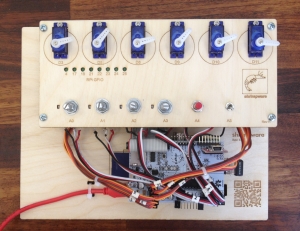
Ahh... clean.
How? - Buy the BreadBox kit from Shrimpware LLC. The instructions are available on this web site and I think they're pretty good. You'll have to be able to do some rough soldering. I also provide some simple Arduino software you can use to get started. The software is not spectacular, just a place for you to start.
Any catch? - To be very clear, the BreadBox does *not* come with any computer. You have to supply your own Arduino, or, Raspberry Pi, or whatever. I think it works best with an Arduino shield that gives you convenient places to plug in your cables. I've used it with both a Raspberry Pi Model B / Arduino Alamode combination and with a Arduino Yun / Sainsmart Sensor Shield (An Uno and Duemilanove also work. With other Arduino boards you might have to drill your own mounting holes in the BreadBox base - not hard to do!)
Documentation - See the latest documentation for assembly instructions and base software.
Projects - As I play with my own BreadBox I'll put projects on this web site with sample code to help you get started.
- PIR - Passive Infrared Motion Detector. A simple project to hook one up.
- Five Button Joystick - An easy project to show the joystick controlling the servos.
More photos of The BreadBox
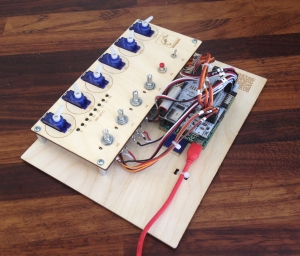
This shows the BreadBox kit. Easy to sit on a table and play with. I've outfitted it here with a Raspberry Pi and Alamode.
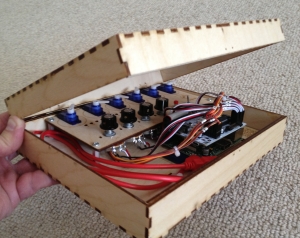
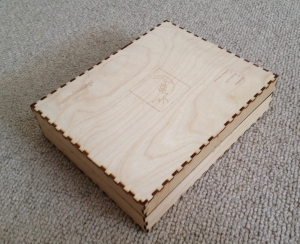
Here's a picture of the assembled BreadBox in The Logo Box. Close the lid and it is all nice and neat to travel. See how that USB cable can just sit in there?
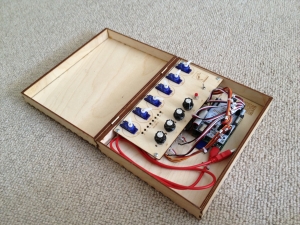
This shows the BreadBox in The Logo Box with the
top open. Nice!
BreadBox inside and safe to go. I've use spray paint to customize some of my own Logo Boxes.
How To Order - you can't
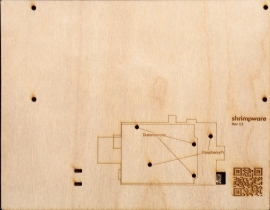
The kits were made of cabinet grade Baltic birch plywood and precision cut by laser. The process leaves some resinous residue on the wood. Most of the residue will come off with a light rub from a damp cloth. You can also lightly sand the pieces with 320 grit sandpaper, spray paint the pieces to customize your kit, or leave it as-is. I find that the bare wood with slight resin marks gives the whole thing a nice steam punk kind of feel.
The only way to get a box now is to make it yourself. If you don't have a laser cutter, Google for "makerspace near me" and you will find a place that can help you make this. Contact me by email and I will send you the files to cut one yourself. jim@shrimpware.com
There were three kits that all work together: the BreadBox, the GPIO LED board, The Logo Box.
Item 001: The BreadBox Mounting Kit
The Shrimpware BreadBox kit was available for purchase through Jameco Electronics! They sold a kit that includes both the electronic components and the mounting kit. Check out the latest assembly instructions.
Item 002: GPIO LED kit
This kit makes it easy to see how the GPIO pins on a Raspberry Pi can control LEDs. The kit is designed to press fit into a row of holes in the BreadBox kit. This kit was only available from Jameco.The latest assembly instructions available here.
See a video of the GPIO LED kit in action.
Item 003: The Logo Box
The BreadBox can be used by itself, sitting on your desk. You can carry it around too. However, a box is nice to have. The BreadBox will fit in a box that has internal size of at least 9 5/8 x 7 1/2 x 2 1/2 (inches). You might find a cool old cigar box or jewelry box to put it in. You could even do some modification of the base to fit in a smaller box.If you want to build a box, then this Logo Box will work for you. This is a set of precision laser cut wood pieces that you can glue together to make a logo box for your BreadBox. The assembly instructions are straight forward, but you have to take some care when gluing the parts. It helps if you have little bar clamps.
Please check out the assembly instructions for the Logo Box to make sure you are comfortable doing the work.
I'll send you the files if you ask.

Notes On Using Arduino and Raspberry Pi
I really enjoy learning new things and sharing them with others. I have a few pages on my web site with the things I've learned about the Raspberry Pi and Arduino, I hope these links help you out.
(c) 2021 Shrimpware LLC All Rights Reserved